MONAI with MATLAB
a getting started guide for using both MONAI and MATLAB
In this short post, we will attempt to run a UNet model implemented using PyTorch (and MONAI, really) within MATLAB. Watch the video we published on the MathWorks YouTube channel here! All the associated code and data is available on GitHub: @amithjkamath/monai-from-matlab.
This is inspired by questions on MATLAB Answers like this:

How to load PyTorch model into MATLAB
or
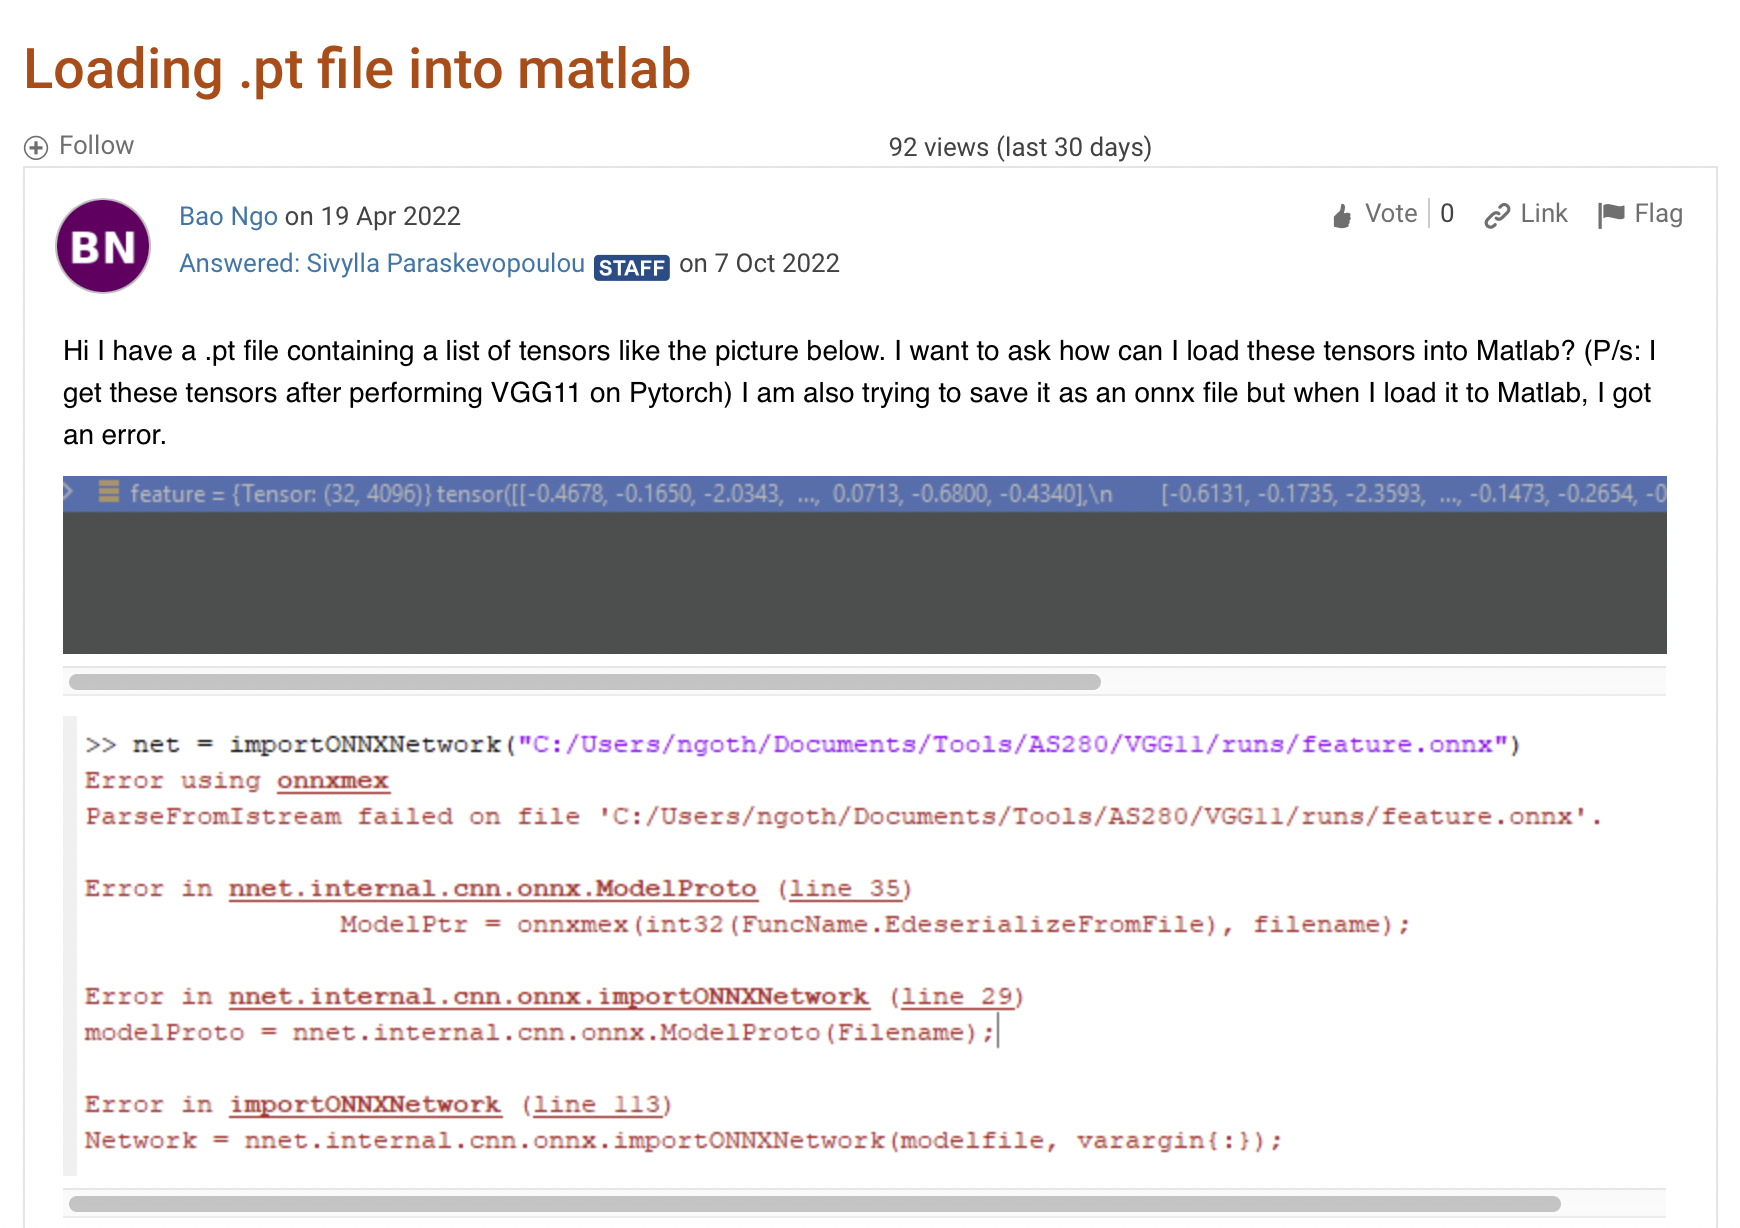
How to load .pth file into MATLAB
Now you might be wondering: why would anyone want to use MONAI, a Python-based deep learning framework—inside MATLAB? Here are a few scenarios where this kind of interoperability becomes not just useful, but essential:
- You already have a mature pipeline in MATLAB, for image pre-processing, statistical analysis, or visualization, and re-writing all of that in Python just to run a deep learning model feels like reinventing the wheel.
- You work primarily in MATLAB, but a collaborator (or a paper) provides you with a powerful MONAI-based deep learning model. Rather than spend hours navigating PyTorch code and virtual environments, you’d prefer to drop it into your existing MATLAB workflow and get back to your research.
- You want to leverage MATLAB’s built-in apps, especially for tasks like interactive labeling or image registration—while still taking advantage of the latest medical imaging AI tools MONAI offers.
If any of these situations sound familiar, or if you’re just curious how these two powerful ecosystems can work together—then read on.
Setting up the MATLAB + Python interface
Establishing the MATLAB–Python interface is a prerequisite for the remaining steps. While the initial setup may seem involved, it is a one-time configuration and not overly complex. The following is how I did this on a computer running macOS 13.3 and MATLAB R2022b. It could also work for newer versions as well.
1. Create a new MATLAB conda environment
Assuming you have Anaconda/miniconda setup (see https://docs.anaconda.com/free/anaconda/install/index.html if you haven’t already), I recommend creating a separate environment to interact with MATLAB. This can be done in the terminal using:
% conda create --name matlab-env python=3.9
Make sure the version of python matches one that is supported by your MATLAB version here: https://ch.mathworks.com/support/requirements/python-compatibility.html (in my case, 3.9 worked).
Then, activate the environment and find out where the python executable is:
% conda activate matlab-env
Then, you run:
% which python
to find the location of the python executable. In my case, for example, it is here (remember this for step 3):
/Users/amithkamath/opt/anaconda3/envs/matlab-env/bin/python
2. Install python dependencies
Next, install pytorch/monai (or whatever dependencies your python code while running in MATLAB has) using %conda install … . To run examples from PyTorch for segmentation, we need both PyTorch and torchvision installed.
% conda install pytorch torchvision
If required, also consider installing monai using
% pip install monai
(If pip isn’t available, you need to set it up, using %conda install pip)
3. Get MATLAB to recognize this environment + libraries
Now start MATLAB and run pyversion with this path (from step 1 above). In my case, this turns out to be:
>> pyversion('/Users/amithkamath/opt/anaconda3/envs/matlab-env/bin/python')
And check that pe = pyenv points to the right locations and all the fields make sense. This returns:
pe =
    PythonEnvironment with properties:

    Version: "3.9"
    Executable: "/Users/amithkamath/opt/anaconda3/envs/matlab-env/bin/python"
    Library: "/Users/amithkamath/opt/anaconda3/envs/matlab-env/lib/libpython3.9.dylib"
    Home: "/Users/amithkamath/opt/anaconda3/envs/matlab-env"
    Status: Loaded
    ExecutionMode: OutOfProcess
    ProcessID: "67023"
    ProcessName: "MATLABPyHost"
Finally, we need to load the python module with functions that are called from MATLAB. To do this, you need to add the module to the ‘path’, this is done using py.importlib.import_module(‘’). For example, with the code in this demonstration, it should look something like this:
>> py.importlib.import_module('monaiInference')
    ans =

    Python module with properties:
        createModel: [1×1 py.function]
        <module ... >
If all of this is setup, congratulations! You can now simply open the live-script titled testMONAIConnector.mlx, and follow along with the sections.
Running the UNet model inference:
In the first section, we reset the python environment within MATLAB, and load the module with the code we expect to run from. Note that while running MATLAB, you don’t need to activate the virtual environment separately, or even open the terminal at all. Once the previous setup has been tested (in step 3), everything else thereon is in MATLAB!
terminate(pyenv)
pyversion('/Users/amithkamath/opt/anaconda3/envs/matlab-env/bin/python')
py.importlib.import_module('monaiInference');
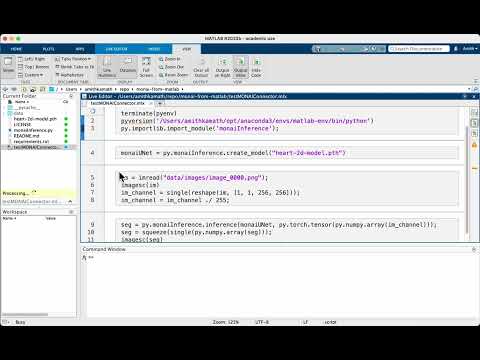
Next, we call directly the create_model function/method defined in the python module called monaiInference from MATLAB. The input to this function is the path to the .pth file where the weights have been saved. This creates a UNet object in the MATLAB workspace!
monaiUNet = py.monaiInference.create_model("heart-2d-model.pth")
Note that you need to edit the create_model function to construct another architecture of your choice if the .pth file contains weights corresponding to that architecture. In this example, we use a UNet built using MONAI, and hence the code is really simple:
def create_model(model_path):
    config = {
        "unet_model_params": dict(
            spatial_dims=2,
            in_channels=1,
            out_channels=1,
            channels=(16, 32, 64, 128, 256, 512),
            strides=(2, 2, 2, 2, 2),
            num_res_units=0,
            norm=Norm.BATCH,
            act="ReLU",
            bias=False,
        ),
    }
    model = UNet(**config["unet_model_params"])
    model.load_state_dict(torch.load(model_path))
    return model
Bear in mind to import all the necessary dependencies!

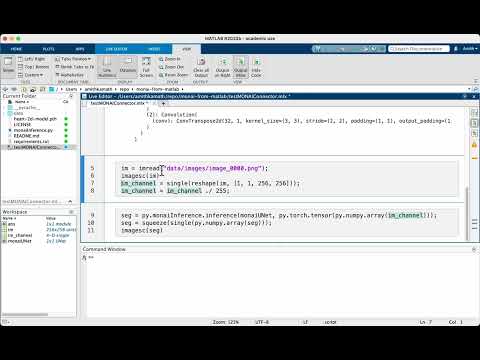
Then, we need to load images to run inference on, and this should be reasonably straightforward MATLAB code imread and so on. Note that we divide the image by 255 to scale the intensity. The model trained in MONAI used the ScaleIntensity transformation, and this operation simply mimics this pre-processing step. Also, if you’re confused with the reshape operation, this is needed because the model expects a 4-D array, where the first two are batch size and channel size - both of which are 1 for a single grayscale image.
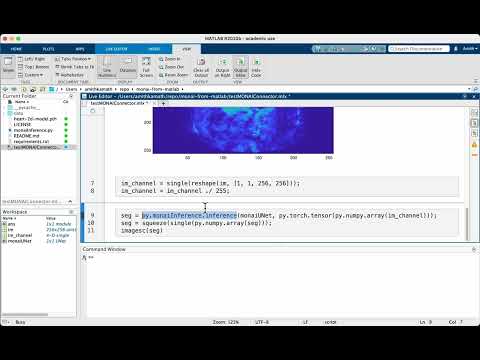
Finally, we run the inference. There’s some magic in this section that needs some explanation. The line to run inference is:
seg = py.monaiInference.inference(monaiUNet, py.torch.tensor(py.numpy.array(im_channel)));
Note that we need to cast the MATLAB array in im_channel first to a numpy array, and then to a torch tensor. The calls wrapping py.numpy.array and py.torch.tensor do just this, where py really indicates to MATLAB that whatever comes after it is from a module that’s available in the pyenv loaded. A similar story in this line:
seg = squeeze(single(py.numpy.array(seg)));
to undo these data type changes and bring things back to the MATLAB world. Of course these could be done more neatly within a function, but then it’s harder to show exactly what happens under the hood (and so pardon my shabby code in the interest of interpretability ;-) )
And voila, there you have it: a fully functioning UNet model running within MATLAB! If you asked me a few years ago if something like this could be possible, I’d have laughed out loud. I’m glad to see how languages and tools evolve over time, and hope to see more movements in these directions!
References
https://github.com/matlab-deep-learning/Automate-Labeling-in-Image-Labeler-using-a-Pretrained-TensorFlow-Object-Detector for taking this a step further and running a model within an automation algorithm (possibly fodder for another blog post here, next!)
https://ch.mathworks.com/products/matlab/matlab-and-python.html?requestedDomain=en for general notes on Python + MATLAB.